Contributing
We <3 contributions; please feel free to check out the code!
In general, this is a quick overview of how to contribute to DJOAuth2
using the standard Github pull-request flow. For more information,
Github has a nice overview here.
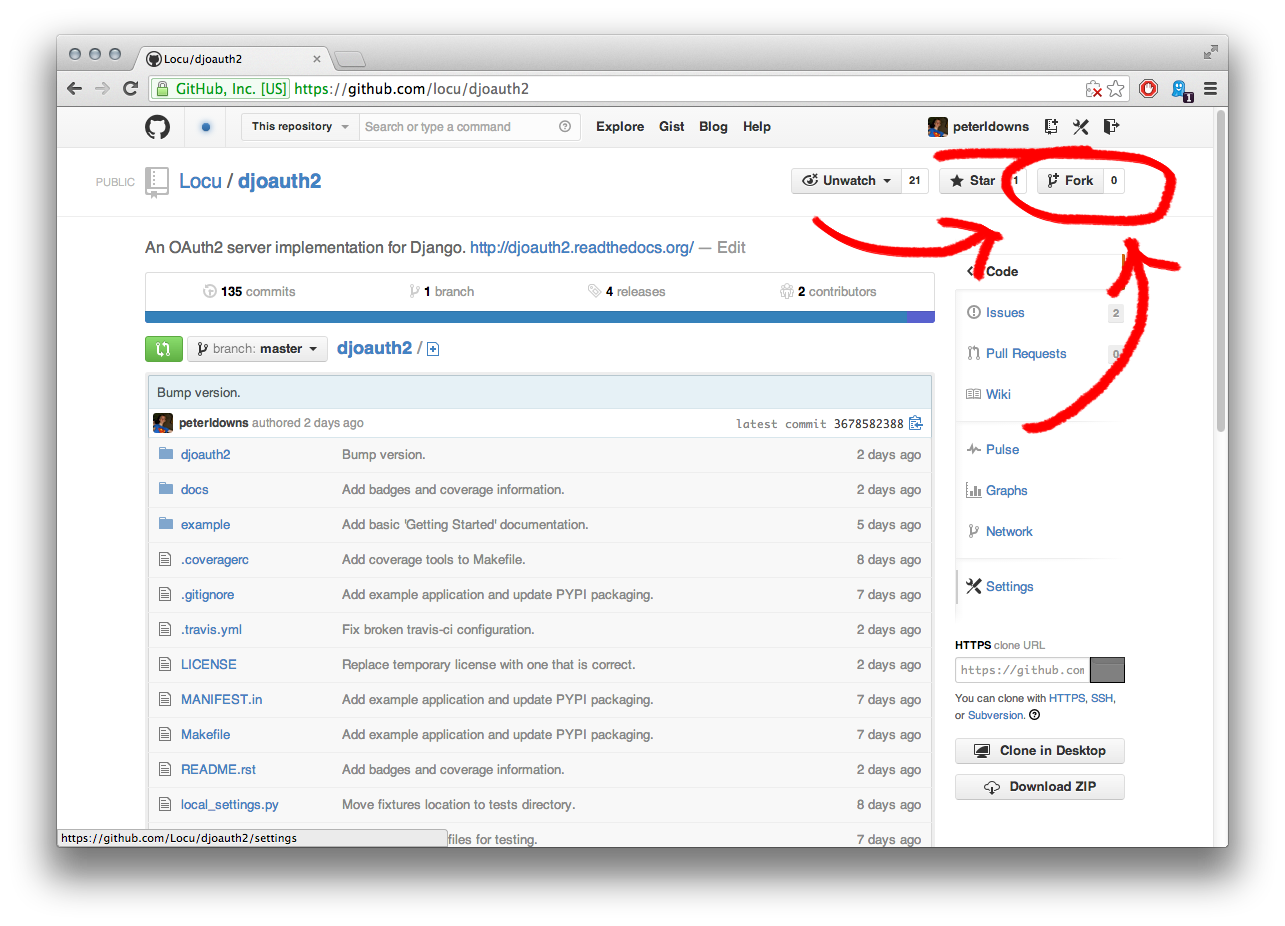
Fork and clone the repository
The first step of contributing is creating your own copy (“fork”) of the main DJOAuth2 repository. Do this through the Github web interface:
Now that you have a copy, copy the “SSH clone URL” from the right-most column:
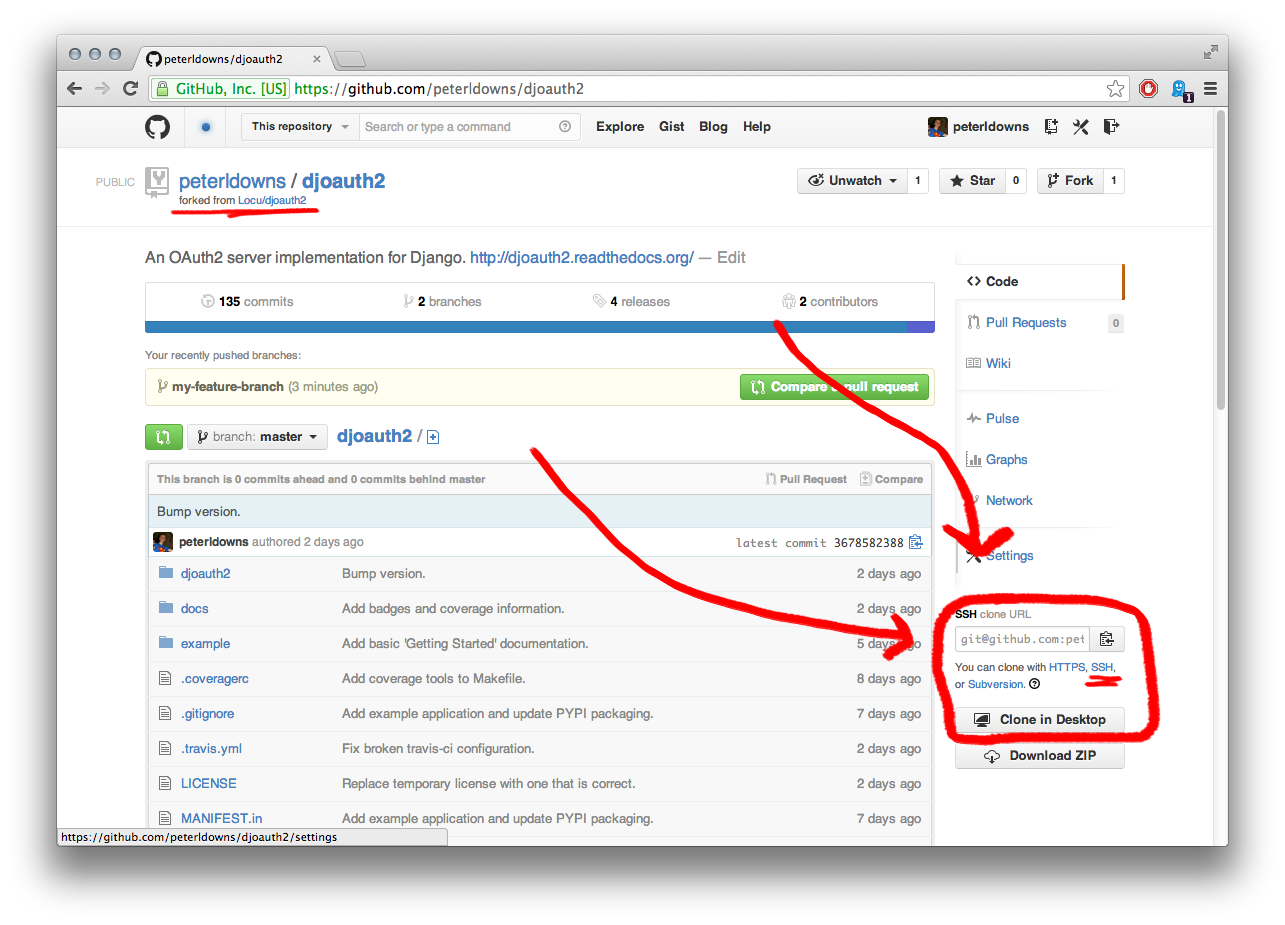
and run the following commands from a local terminal:
cd ~

# The git@github.com URL is the "SSH clone URL" that you copied.
git clone git@github.com:<YOUR_USER_NAME>/djoauth2.git
cd djoauth2
Install dependencies
We rely on virtualenv for managing dependencies in order to make it as easy as possible to start contributing. Before contributing, run the following commands:
# Install development dependencies inside a new virtualenv
make dev-env

# Activate the virtualenv so that you have access to the dependencies that
# were installed.
. dev-env/bin/activate
Making changes
After setting up your virtualenv, check out a new branch locally:
git checkout -b 'my-feature-branch'
Now make your changes. Don’t forget to update the tests! Please follow our style guide:
- 2-space indents
- All indents are spaces, not tabs.
- Wrap lines at 80 characters.
vim djoauth2/...
vim djoauth2/tests/...
Schema Migrations
If your changes touched the models.py file, you must attempt to generate a
South migration in case the schema has changed.
It’s important that for backwards-compatibility reasons you use South version
0.7.6 and Django 1.4.3 to generate migration files. After entering the dev-env virtualenv,
run the following commands:
pip install Django==1.4.3
pip install South==0.7.6
Then, generate the migrations with the included script:
./generate_migrations.py

# Now, test to see that they apply without an error.
./generate_migrations.py --test-migrations
Testing
DJOAuth2 is a standalone Django application, which can be hard to test. To
obviate a need for installing and re-installing inside of a test project, we
provide a script (runtests.py) that sets up a minimal Django environment
To use it, enter your shell and run:
# Run all of the tests
./runtests.py
# or
make tests

# Run a group of tests
./runtests.py djoauth2.tests.TestAuthorizationCodeEndpoint

# Run an individual test
./runtests.py djoauth2.tests.TestAuthorizationCodeEndpoint.test_get_requests_succeed
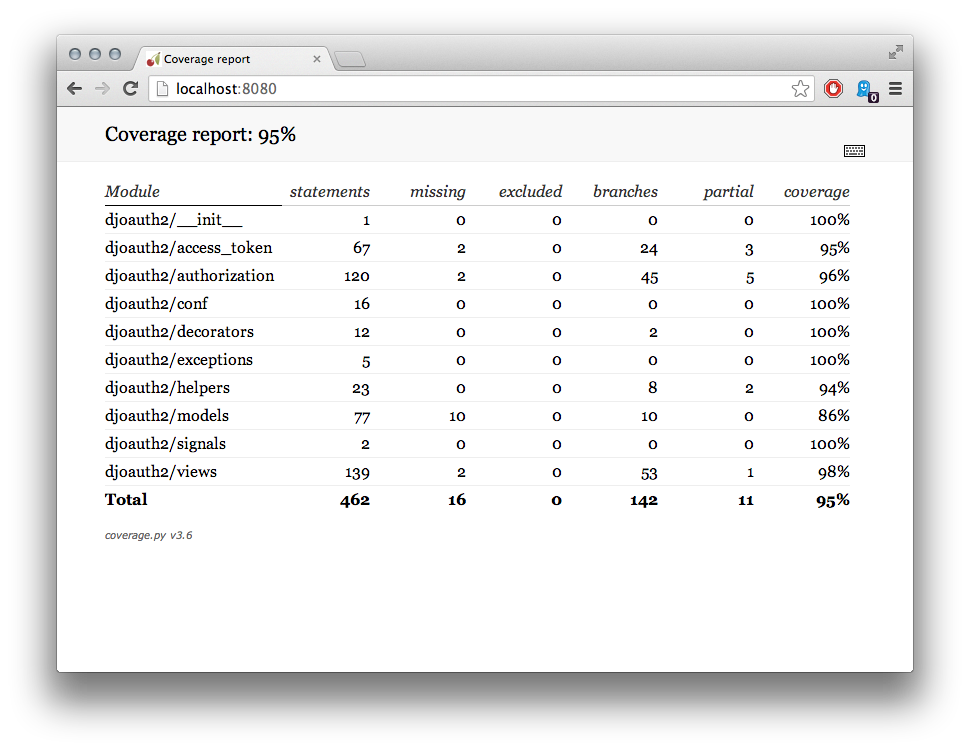
Coverage
While we don’t fetishize 100% coverage, it can be useful to double check that testing actually exercised the code that you added.
To get a coverage report, run make coverage. This will output a brief
summary report in the terminal and also generate an interactive HTML version of
the report. The interactive version will display the code line-by-line and
highlight any code that was not covered by the tests.
# Generate the coverage report
make coverage

# Fire up a webserver to view the interactive HTML version
cd docs/coverage/
python -m SimpleHTTPServer 8080

# Now navigate to localhost:8080 in a browser
Updating Documentation
Made changes that require documentation (hint: probably)? Rebuild the docs:
make docs
And view them in your browser locally:
cd docs/_build/html
python -m SimpleHTTPServer 8080

Now navigate to localhost:8080 in a browser
By the way, if you have any questions, concerns, or complaints about the current documentation, please let us know and/or submit a pull request! We’re committed to making the docs as easy to use as possible, so if something is not working we’d love to hear it.
Committing
Once your changes are finished (including tests and documentation) it’s time to commit them:
git commit -a -m "Add my new feature."
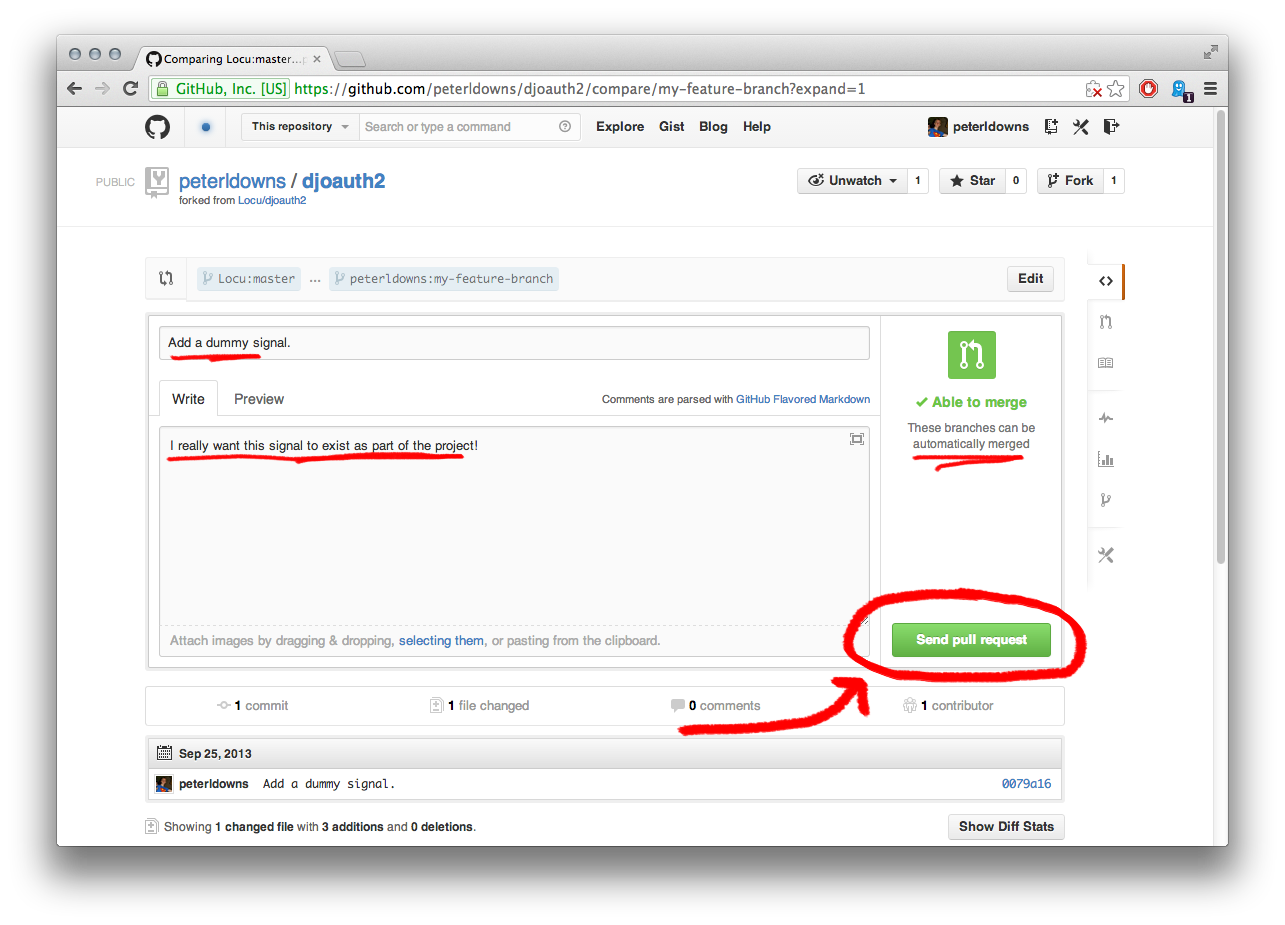
Submitting a pull request
Once your changes are locally committed and tested, it’s time to submit a pull request to get your changes reviewed and merged upstream. Again, Github has a nice overview here.
- Push your changes to your github repository:
git push origin my-feature-branch

- In Github, switch to
my-feature-branch
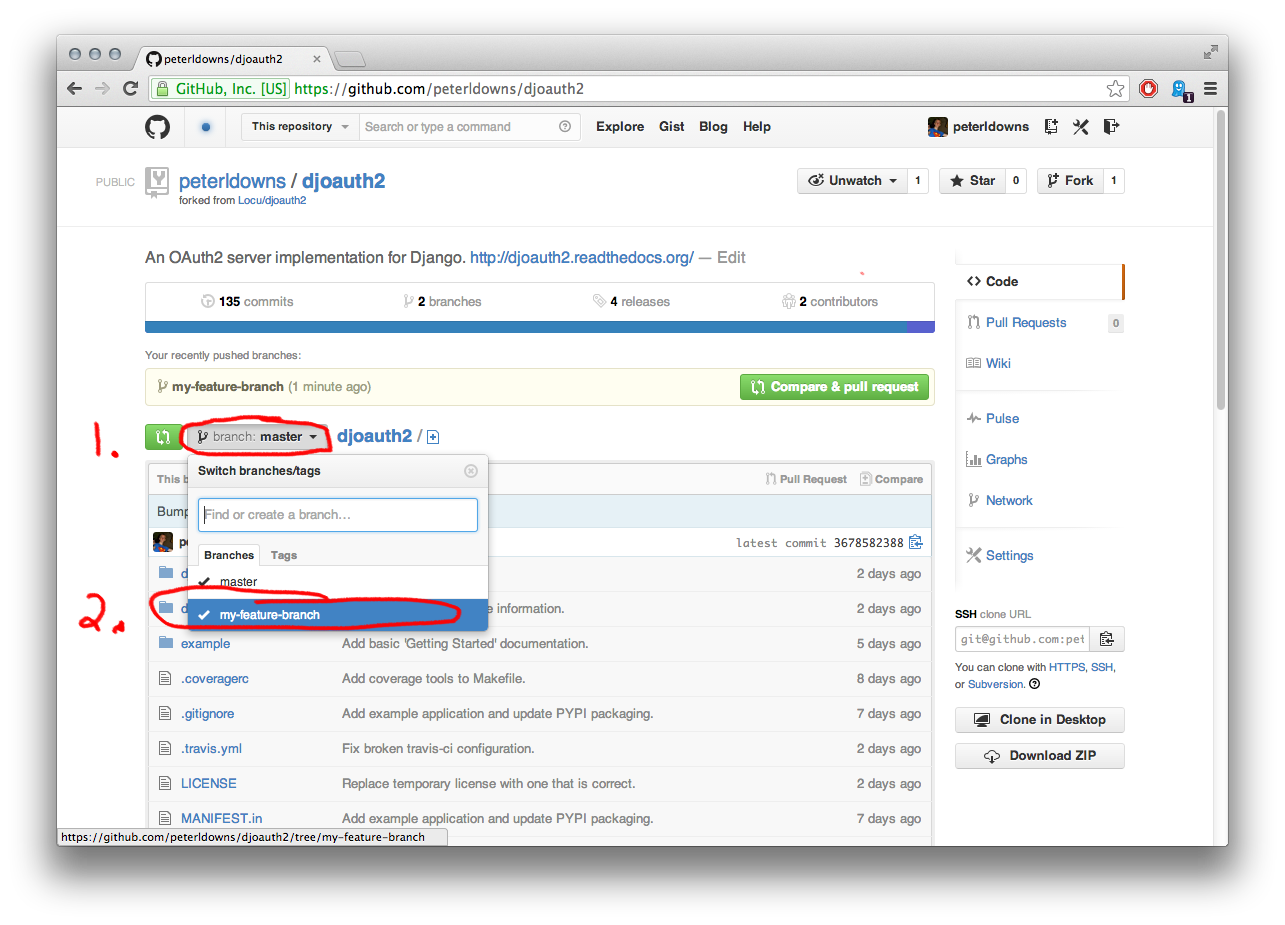
- Click on the large green “compare & pull request” button:
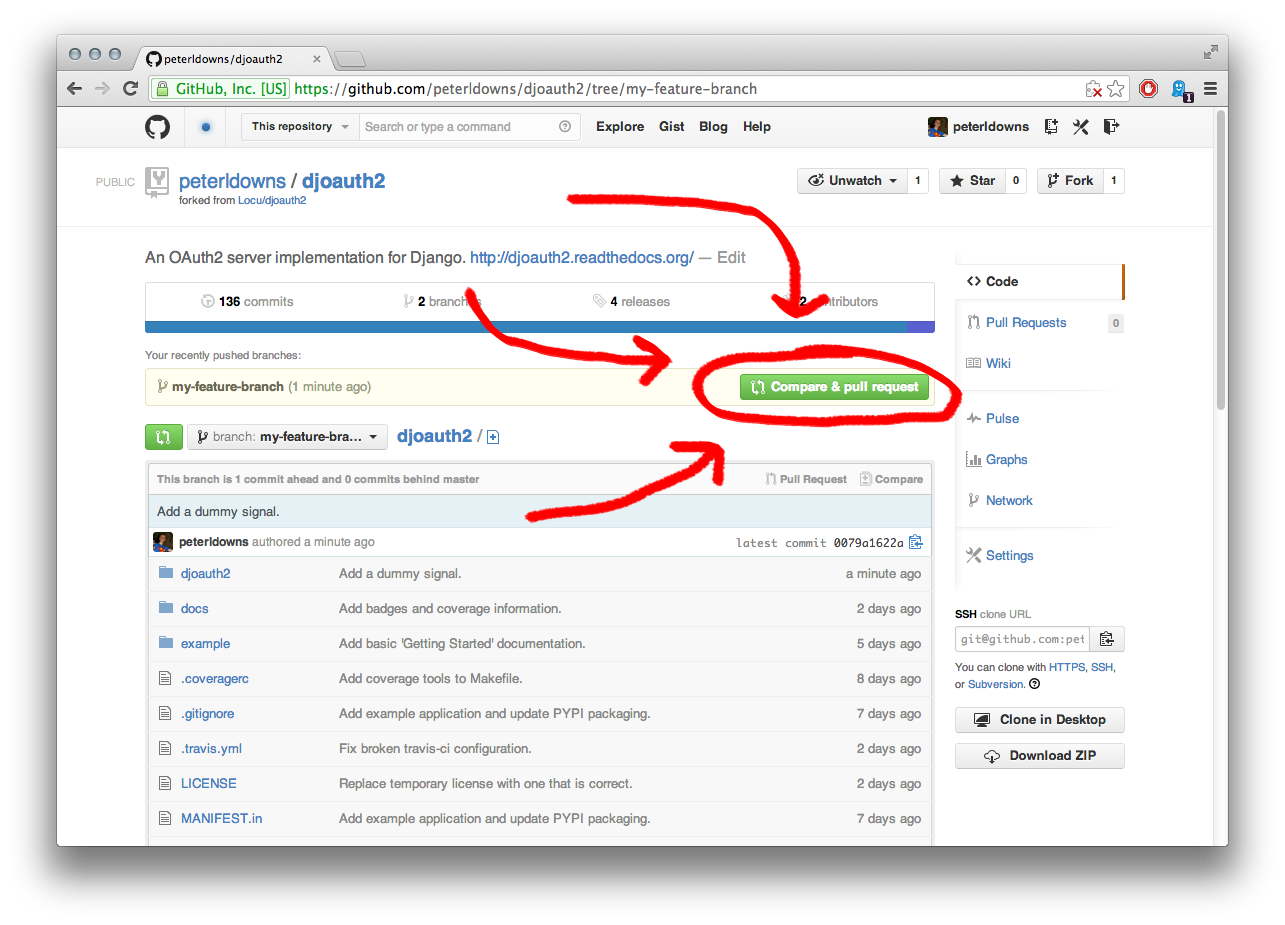
- Write up a nice explanation of your changes and fire it off!